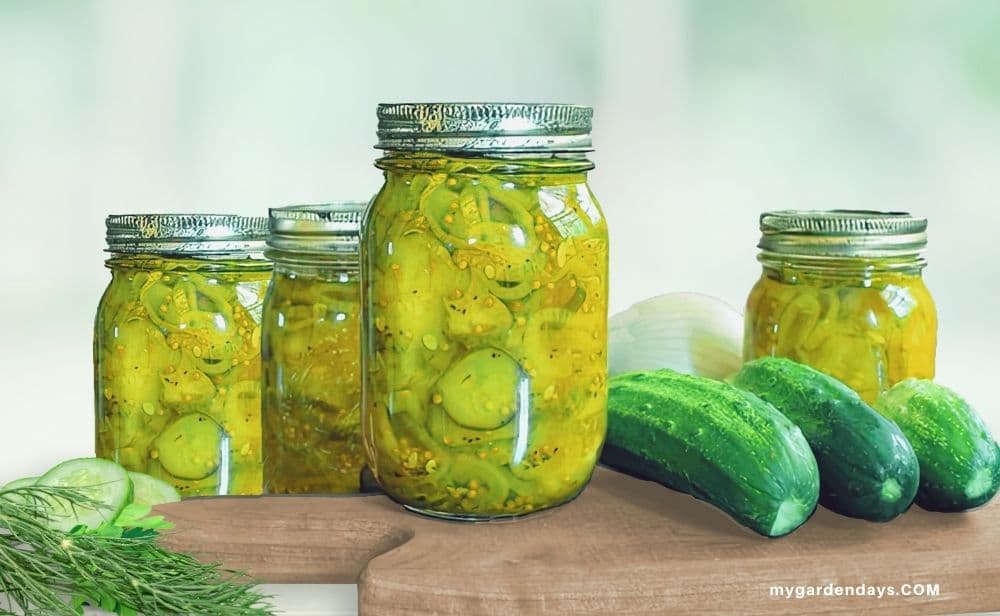
How To Make Bread And Butter Pickles
Have you ever opened a jar of bread and butter pickles and been hit with that perfect mix of tangy, sweet, and crisp? These golden-green slices of cucumber, layered with onions and speckled with mustard seeds, are more than just a condiment—they’re a burst of summer in every bite.
In this post, you’ll learn how to turn fresh garden cucumbers and onions into jars of irresistible pickles you’ll be proud to share and enjoy all year long.

When I was a kid, there was always a jar of bread and butter pickles in the fridge. My grandmother made them every summer, lining her counter with jars that caught the sunlight like little treasures. I remember sneaking a forkful straight from the jar, the crunch echoing in the quiet kitchen.
Now, making them from my own garden cucumbers feels like carrying on her tradition—and I’m reminded that the best recipes aren’t just about the food, but the memories they hold.
Tips For Making Bread & Butter Pickles
- Harmful bacteria are your enemy when canning. They cause spoilage and food poisoning.
- For this reason, use clean produce with no soft spots.
- Use canning jars and new lids. Make sure they are all sterilized.
- Acid is your friend because those harmful bacteria cannot grow in an acidic environment.
- For this reason, pickled veggies make a great canning project for beginners. The sweet-and-tangy brine creates that lovely acidic environment.
- If you follow all the canning directions carefully, these pickles will keep for a year in a cool, dark place.
- The canning rings should be screwed on so they are finger-tight. Don’t over-tighten. This will allow the air to vent during processing and help create a good seal.
- Reuse screw bands if they’re in good shape. However, never reuse lids.
- Please visit the National Center for Home Food Preservation’s canning guide to learn how to can safely.
Ingredients for Bread and Butter Pickles
- Pickling Cucumbers – Provide the crisp texture and fresh flavor that make these pickles irresistible.
- Onions – Add a mild sweetness and depth that balances the tangy brine.
- Apple Cider Vinegar – Gives the pickles their signature tang and helps preserve them.
- Brown Sugar – Brings a sweet counterpoint to the vinegar, creating the classic bread and butter pickle flavor.
- Canning Salt – Draws moisture from the vegetables and enhances overall taste.
- Herbs and Spices (mustard seeds, coriander seeds, red pepper flakes, turmeric, celery seeds) – Infuse the brine with warm, zesty, and slightly spicy notes.
Equipment for Canning
- Water bath canner
- Canning funnel
- Wide-mouth pint Mason jars
- Metal heat-resistant tongs (for placing lids)
- Small saucepan
- Oven gloves
- Wide-mouth Mason jar lids
- Canning lid rack (optional, but saves a lot of frustration)
- Canning Jar Lifter Tongs
- Plastic bubble remover
How to Make Bread and Butter Pickles
Wash and trim the cucumbers; slice them into coins. Use a crinkle cutter if you wish. Slice the onions thinly.
Toss cucumbers and onions with canning salt in a big bowl. Cover the vegetables with ice and let them rest for 2 hours.
After about an hour and a half, sterilize anything that comes into contact with the bread and butter pickles.
- The jars, canning funnel, and tongs can be placed on a cookie sheet in a 220°F oven for 20 minutes.
- The bubble remover can be washed in hot, soapy water and air-dried.
- At the same time, place your lids in the canning lid rack. Simmer them in a small pot of water for 20 minutes. Keep everything nice and hot until you’re ready to fill. Handle hot jars, equipment, and lids with care to avoid burns.
Drain the vegetables in a colander, rinse well, and pat everything dry. Crisp is the goal.
Make the brine: bring vinegar, sugar, and your spices (mustard and coriander seeds, turmeric, celery seed, plus a pinch of red pepper flakes if you like) to a gentle boil. Stir until the sugar melts and the kitchen smells amazing. Add the vegetables to the saucepan and bring it back to a boil.
Set a canning funnel on a hot, clean jar. Ladle the cucumber–onion mixture into the jars, leaving ½ inch headspace in each.
Slide a clean chopstick or plastic knife down the sides to release air bubbles. Adjust headspace if needed. Wipe rims with a clean cloth. Add two-piece lids. Screw bands on fingertip-tight (snug, not cranked).
Process jars in a boiling-water bath for 10 minutes.
Lift jars out and place on a towel. Let cool, undisturbed, for 12–24 hours. Press the center of each lid; it should not flex.
Any jar that didn’t seal goes in the fridge—enjoy that one first. Sealed jars can be stored in a cool, dark pantry for up to one year.
Variations To Try
- Spicy kick: Add sliced jalapeños or a pinch of red pepper flakes to the brine for sweet heat.
- Garlic lovers: Tuck a few smashed garlic cloves into each jar for a savory twist.
- Sweet bell pepper crunch: Mix in thin strips of red or yellow bell pepper for extra color and snap.
Looking for more simple canning recipes to use up your garden harvest? Try our authentic Marinara Sauce.
How to Make Refrigerator Bread & Butter Pickles
- Use one-quarter of every ingredient from the main recipe.
- Follow the same steps to prep the veggies and make the brine.
- Pack the vegetables into a clean (sterilized ) jar and pour in the hot brine to cover. Let cool, then cover and refrigerate—no water bath needed.
- Chill for 24 hours before tasting for the best flavor. Use within 1 month.
Looking for more simple canning recipes? We’ve got a collection of 21 easy canning recipes.
Bread and butter pickles are a simple, satisfying way to preserve the fresh flavors of your garden. With just a few ingredients and a little time, you’ll have jars of sweet, tangy pickles ready to enjoy all year long. Go ahead and print the recipe to keep on hand. Don’t forget to pin this post so you can find it when pickle season rolls around again.
Bread and Butter Pickles
Ingredients
Equipment
Method
- Wash and trim the cucumbers; slice them into coins. Use a crinkle cutter if you wish. Slice the onions thinly.
- Toss cucumbers and onions with canning salt in a big bowl. Cover the vegetables with ice and let them rest for 2 hours.
- After about an hour and a half, sterilize jars, lids, ladle, canning funnel, and tongs. Fill the water bath and bring it to the boil.
- Drain the vegetables in a colander, rinse well, and pat everything dry. Crisp is the goal.
- Make the brine: bring vinegar, sugar, and your spices to a gentle boil. Stir until the sugar melts. Add the vegetables to the saucepan and bring it back to a boil.
- Set a canning funnel on a hot, clean jar. Ladle the cucumber–onion mixture into the jars, leaving ½ inch headspace in each.
- Slide a clean chopstick or plastic knife down the sides to release air bubbles. Adjust headspace if needed.
- Wipe rims with a damp paper towel.
- Add two-piece lids. Screw bands on fingertip-tight.
- Process jars in a boiling-water bath for 10 minutes.
- Lift jars out and place on a towel. Let cool, undisturbed, for 12–24 hours.
Notes
- You can also make this recipe as a refrigerator pickle—just skip the canning step and pop the jars straight into the fridge. It’s best to halve or quarter the ingredients to make a smaller batch, as they only last a month.
- Canned pickles will need at least a week to develop flavor, but they’re even better after 4–5 weeks… if you can wait that long!
- North American Variation: Swap the apple cider vinegar for 3 cups of white vinegar, and use 2 cups of granulated sugar instead of packed brown sugar.
- Zesty Version: For a bolder flavor, replace the celery seeds with 2 tablespoons of prepared horseradish and the turmeric with 2 tablespoons of grated ginger.